How to use Filtered actions in TxDialer ?
Overview
The Filtered Action feature on the Campaign Contacts page allows users to filter campaign contacts based on specific criteria and perform bulk actions on the filtered records.
Accessing Filtered Actions
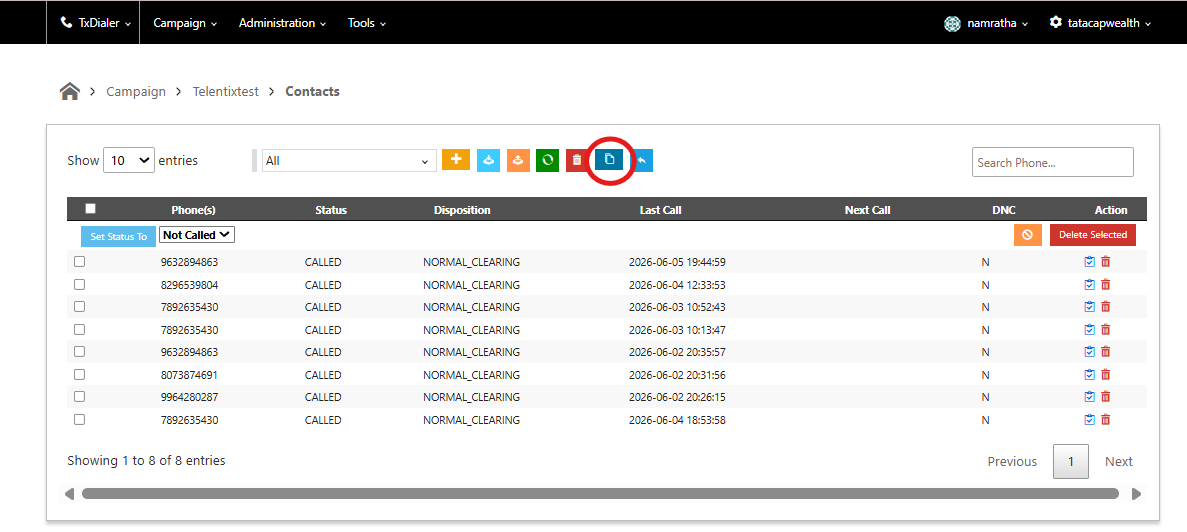
- Navigate to the Campaign Contacts page
- Click the Filtered Action icon.
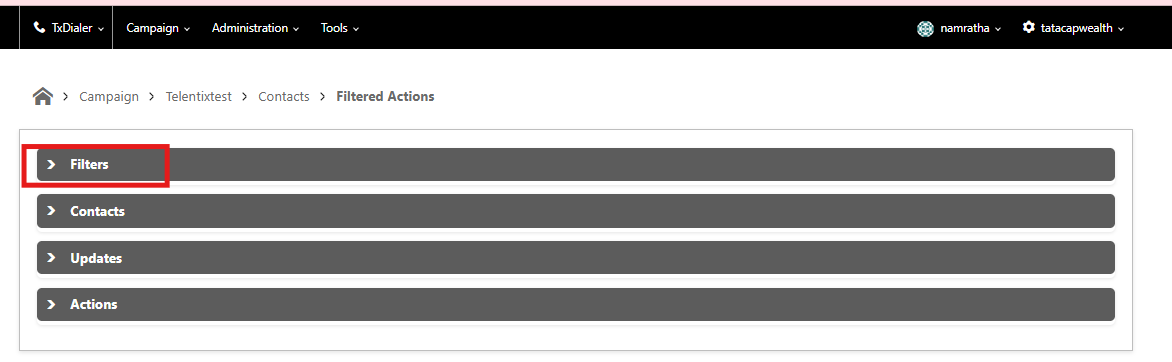
1. Filter Tab
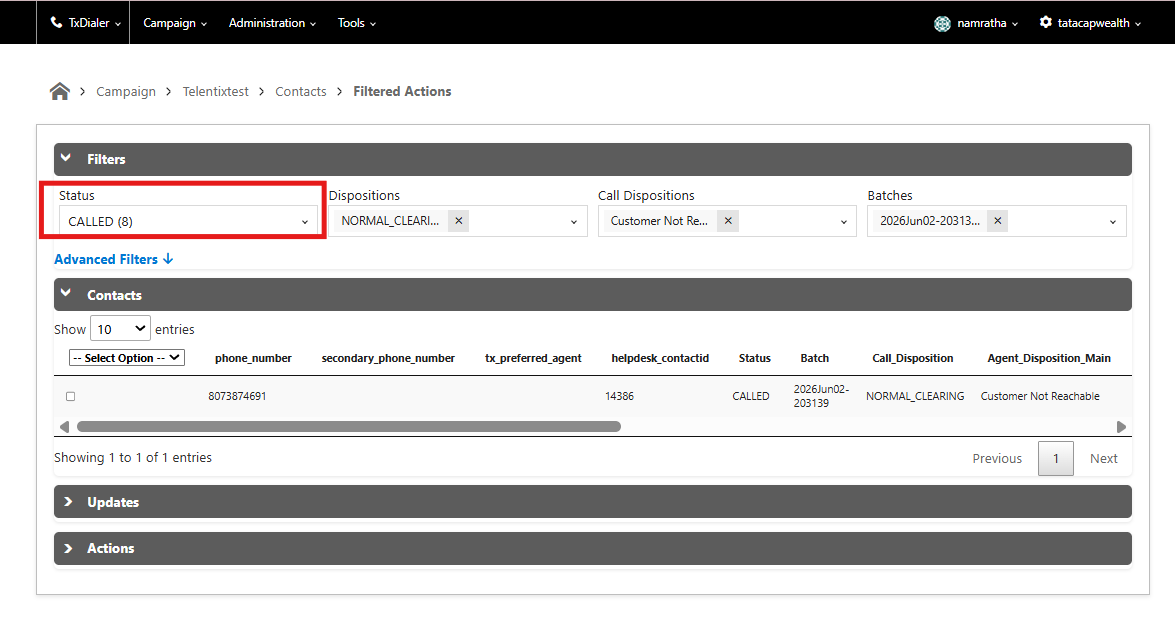
Filter by Status
- Select the required contact Status
- The system will display contacts matching the selected status
Filter by Disposition, Call Disposition, or Batch
- Select the required Disposition or Call Disposition
- Choose the desired Batch from the dropdown list (CSV upload batch)
- The filtered contacts will be displayed accordingly
Advanced Filtering
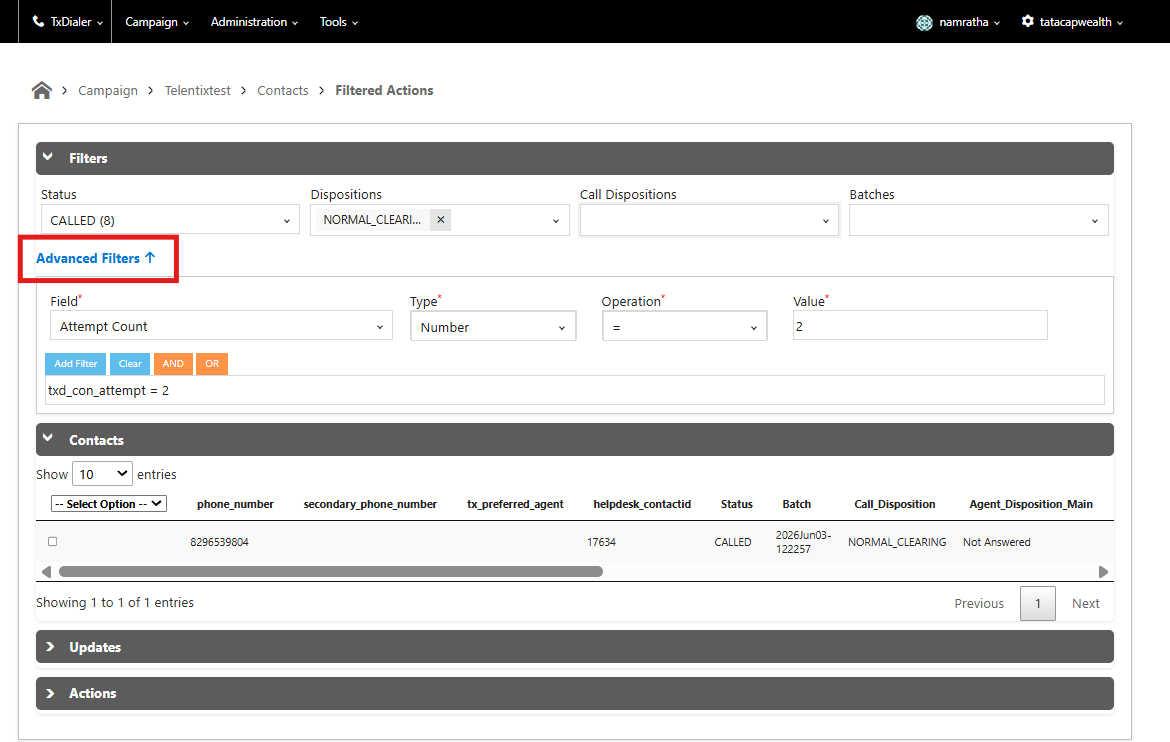
- Select the required:
- Field
- Type
- Operation
- Value
- Click Add Filter
- The system will display contacts matching the specified criteria
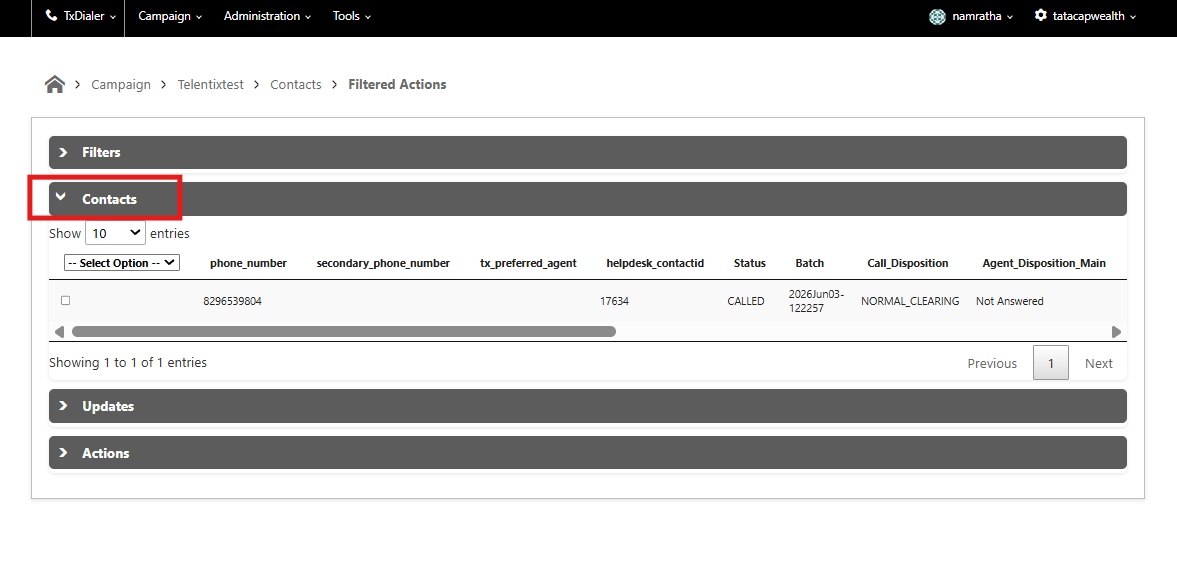
2. Contacts Tab
The Contacts Tab displays all contacts that match the filters applied in the Filter Tab.
3. Updates Tab
The Update Selected Contacts feature allows users to perform bulk updates on selected campaign contacts. This is useful for modifying contact behavior, scheduling callbacks, assigning preferred agents, and managing DNC settings.
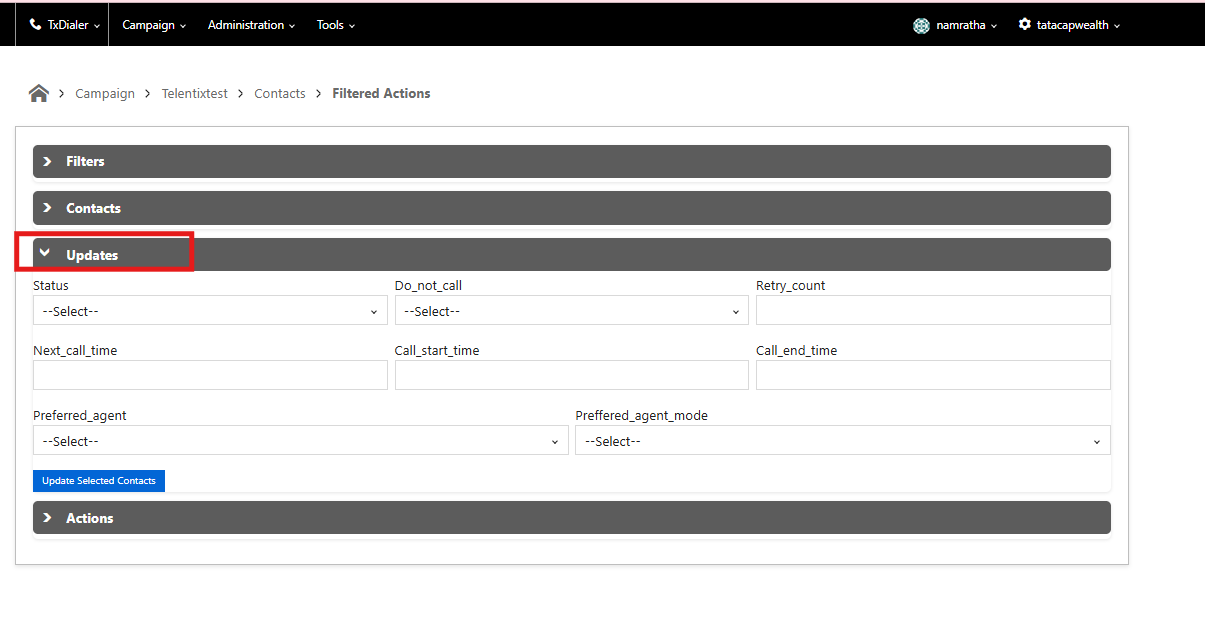
Available Fields
1. Status
- Used to update the status of selected contacts
- Common statuses:
- Not Called
- Called
- Callback
- Completed
- Failed
- Other campaign-specific statuses
- Example: Update contacts from Not Called → Called
2. Do Not Call (DNC)
- Used to mark contacts as Do Not Call
- Options:
- Yes
- No
- Prevents future dialing attempts if enabled
3. Retry Count
- Defines number of retry attempts for selected contacts
- Used for retrying failed or unanswered calls
4. Next Call Time
- Schedules the next dialing attempt
- Used for callback scheduling
5. Call Start Time
- Defines when contact becomes eligible for dialing
- Ensures calls are placed only within allowed hours
6. Call End Time
- Defines cutoff time after which dialing stops
- Prevents calls outside approved calling hours
7. Preferred Agent
- Assigns a specific agent to selected contacts
- Ensures continuity in customer handling
8. Preferred Agent Mode
- Defines routing behavior for preferred agent assignment
- Modes may include:
- Strict Agent Assignment
- Preferred Agent with Fallback
- Campaign-specific routing rules
- Ensures routing to the assigned relationship manager when possible
Click Update Selected Contacts to apply changes
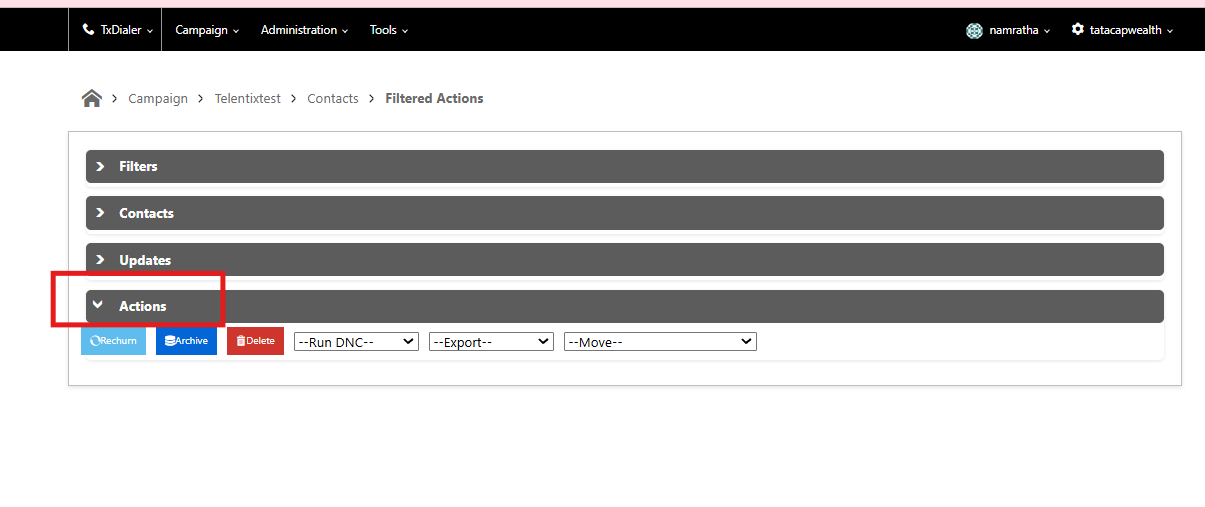
4. Action Tab
The Actions section provides tools to manage selected campaign contacts. These actions help in retrying calls, archiving records, deleting contacts, exporting data, and moving contacts across campaigns.
Example: Updating Contacts from Failed to Not Called Using Filtered Actions
Step 1: Under the Filter tab, select Failed under Status to filter the contacts. The system will display all contacts with the Failed status.
Step 2: If you want to filter Failed contacts for a particular agent, click Advanced Filters and select Preferred Agent under Field, Number under Type, = under Operation, enter the required Agent ID under Value, and click Add Filter.
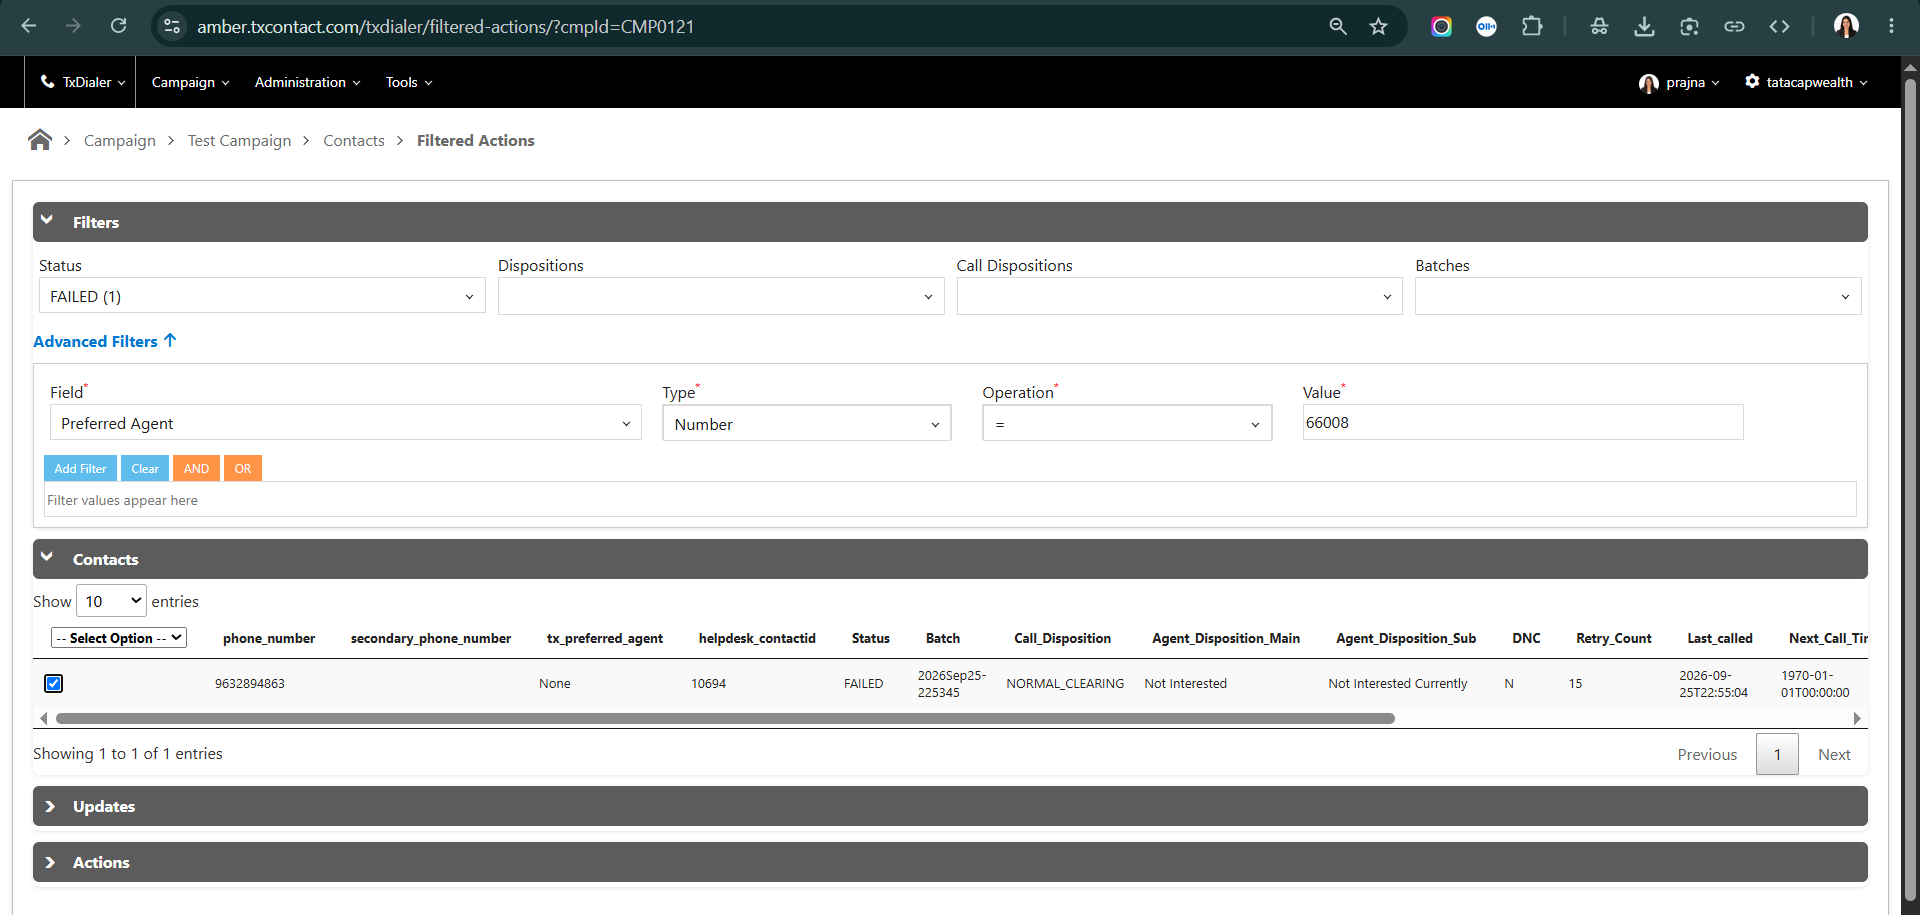
Step 3: Under the Contacts tab, select the required contacts from the filtered results.
Step 4: Under the Updates tab, select Not Called as the new Status and click Update Selected Contacts.
Step 5: A confirmation popup will appear asking if you want to continue. Click OK to proceed.
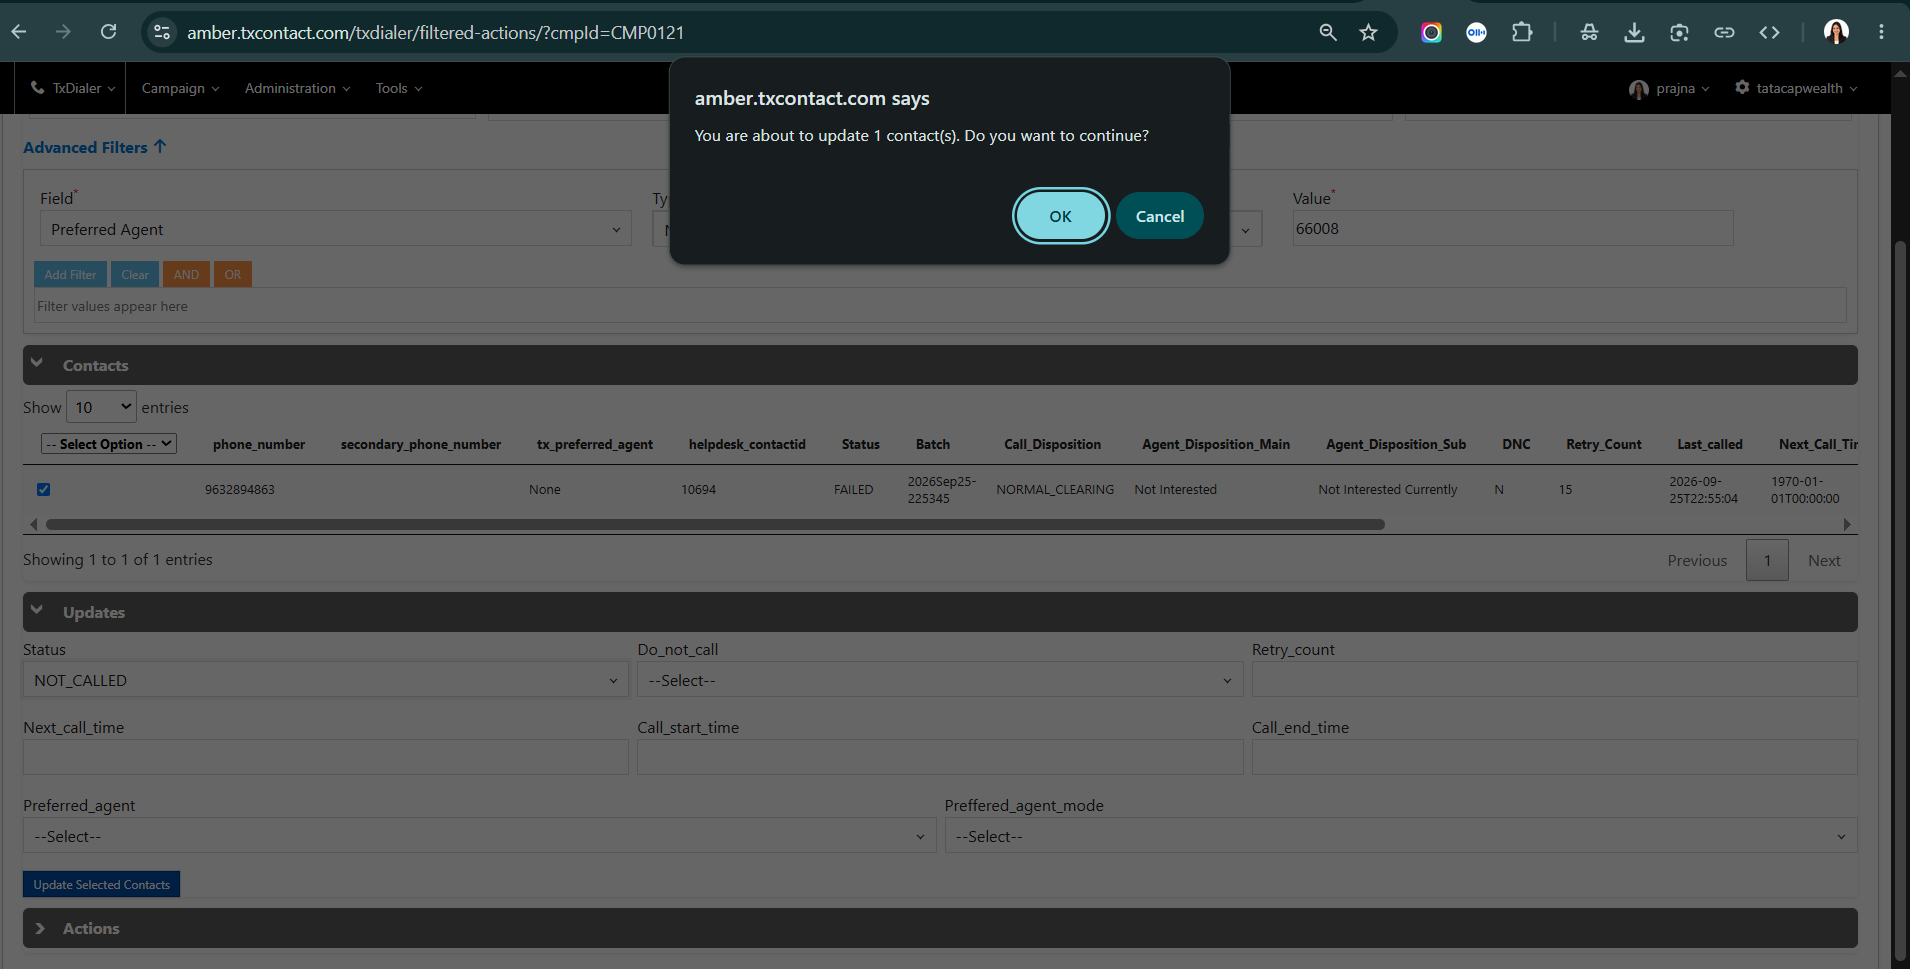
The selected contacts will be updated from Failed to Not Called.
Other Filtered Actions
If you want to perform other actions on the filtered contacts, select the required contacts under the Contacts tab and use the available options under Actions.
You can perform actions such as:
- Export the selected contacts
- Rechurn the selected contacts
- Archive the selected contacts
- Delete the selected contacts
- Run DNC on the selected contacts
- Move from one campaign to another campaign
These actions can be performed independently based on the required operation.
All bottom-line icons are used for manual filtered actions.
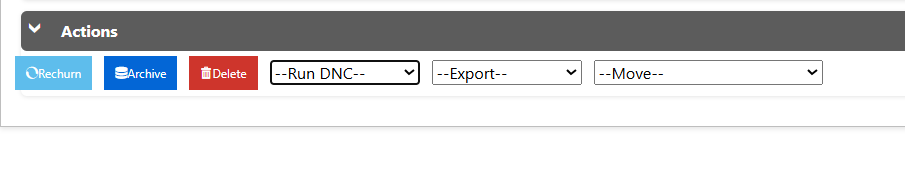
- Rechurn is used for redialing failed contacts.
- Archive is used to archive contacts.
- Delete is used to remove contacts from the system.
- Set Status is used to update contact status such as "Called" or "Not Called".
- Run DNC is used to check DNC or duplicate entries.
- Export is used to download the contact file.
- Move is used to move the filtered contacts from one campaign to another campaign.