How to Add Auto Rechurn2 ?
Overview
Auto Rechurn automatically retries (redials) contacts based on the conditions you configure. This is useful when the first call was unsuccessful, such as when the customer was busy, did not answer, or the call failed.
Example: If a contact's status is Failed, Auto Rechurn can automatically change it back to Not Called so the dialer attempts the call again after the configured interval.Step 1: Open the Campaign
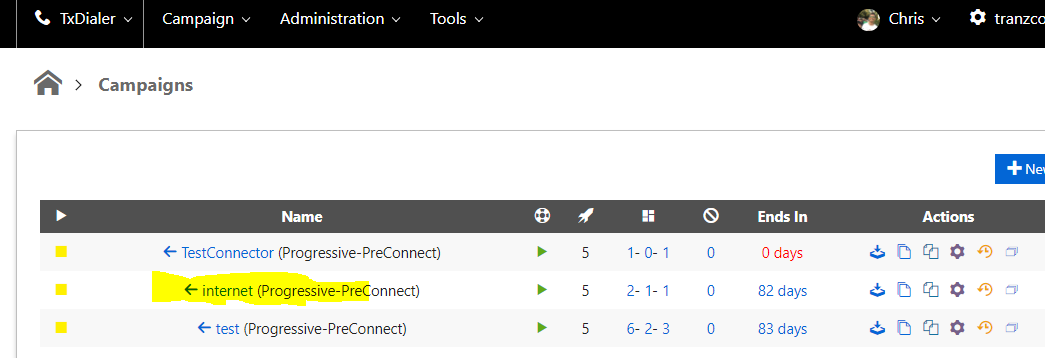
- Go to Campaign List.
- Select the campaign where you want to configure Auto Rechurn
Step 2: Configure Retry Count
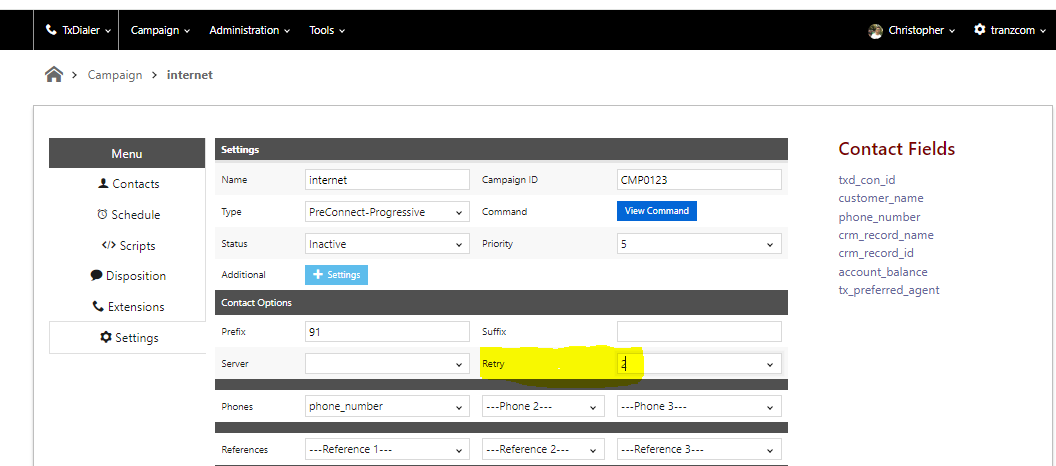
- Open the Campaign Settings.
- Locate the Retry option.
Retry determines how many times a contact can be retried after an unsuccessful call.
Example:
- Retry = 2
- The dialer will attempt to redial the contact 2 more times.
Save the campaign settings after making any changes.
Step 3: Open Contacts
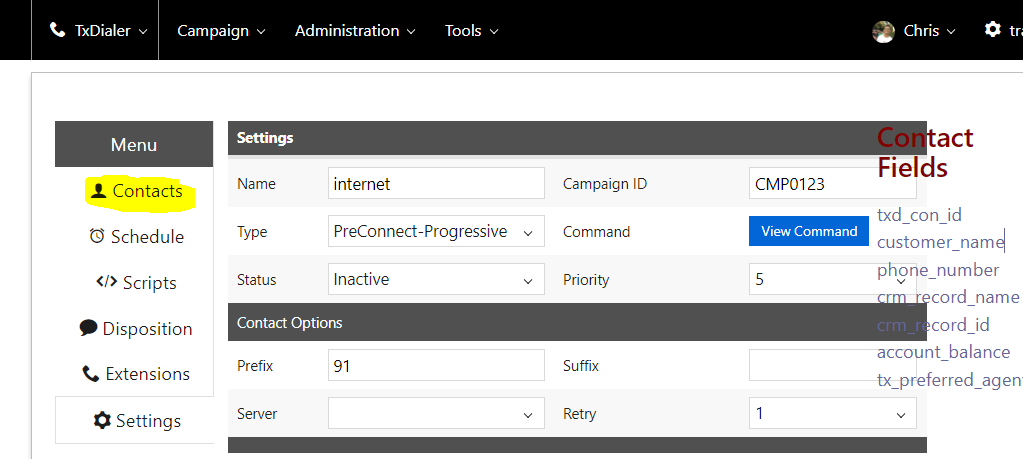
- Click on Contacts.
- The list of uploaded contacts for the selected campaign will be displayed.
Step 4: Open Rechurn Options
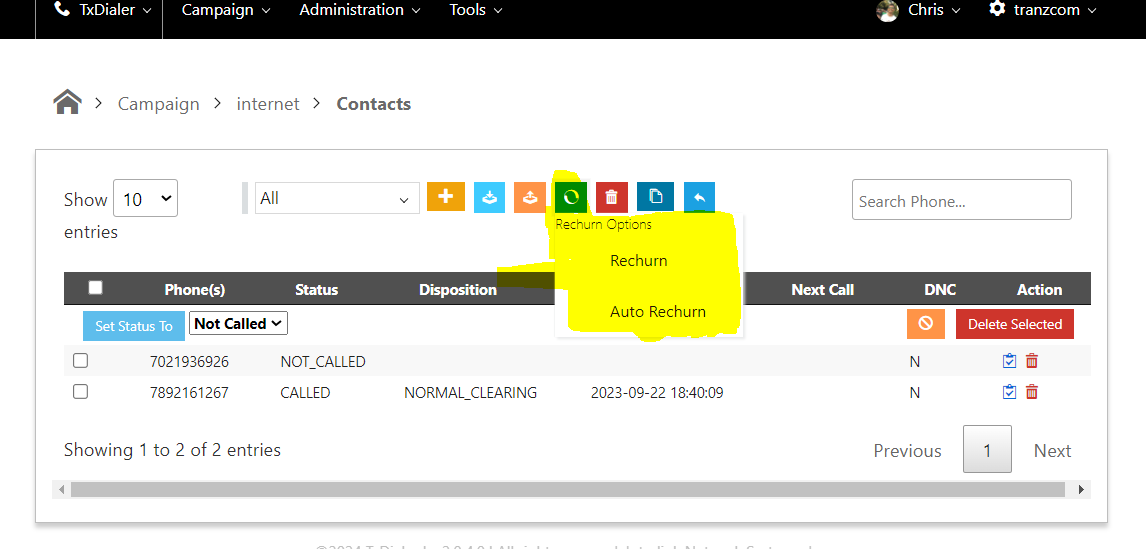
- Click the Rechurn icon.
You will see two options:
- Rechurn – Performs a manual rechurn by changing the contact status immediately.
- Auto Rechurn – Automatically rechurns contacts based on the configured conditions and schedule.
Select Auto Rechurn.
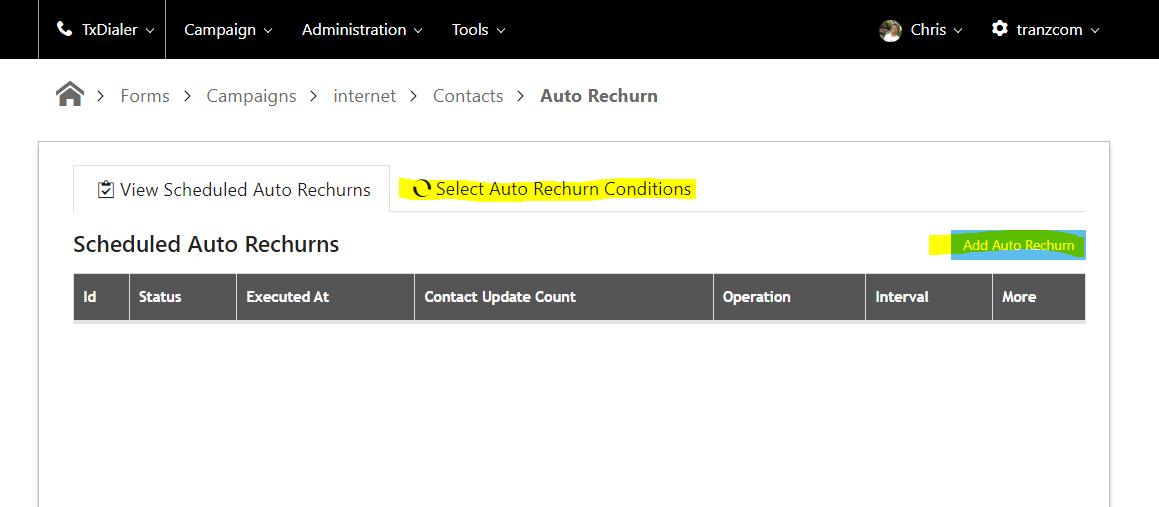
Step 5: Configure Auto Rechurn
Configure the following fields:
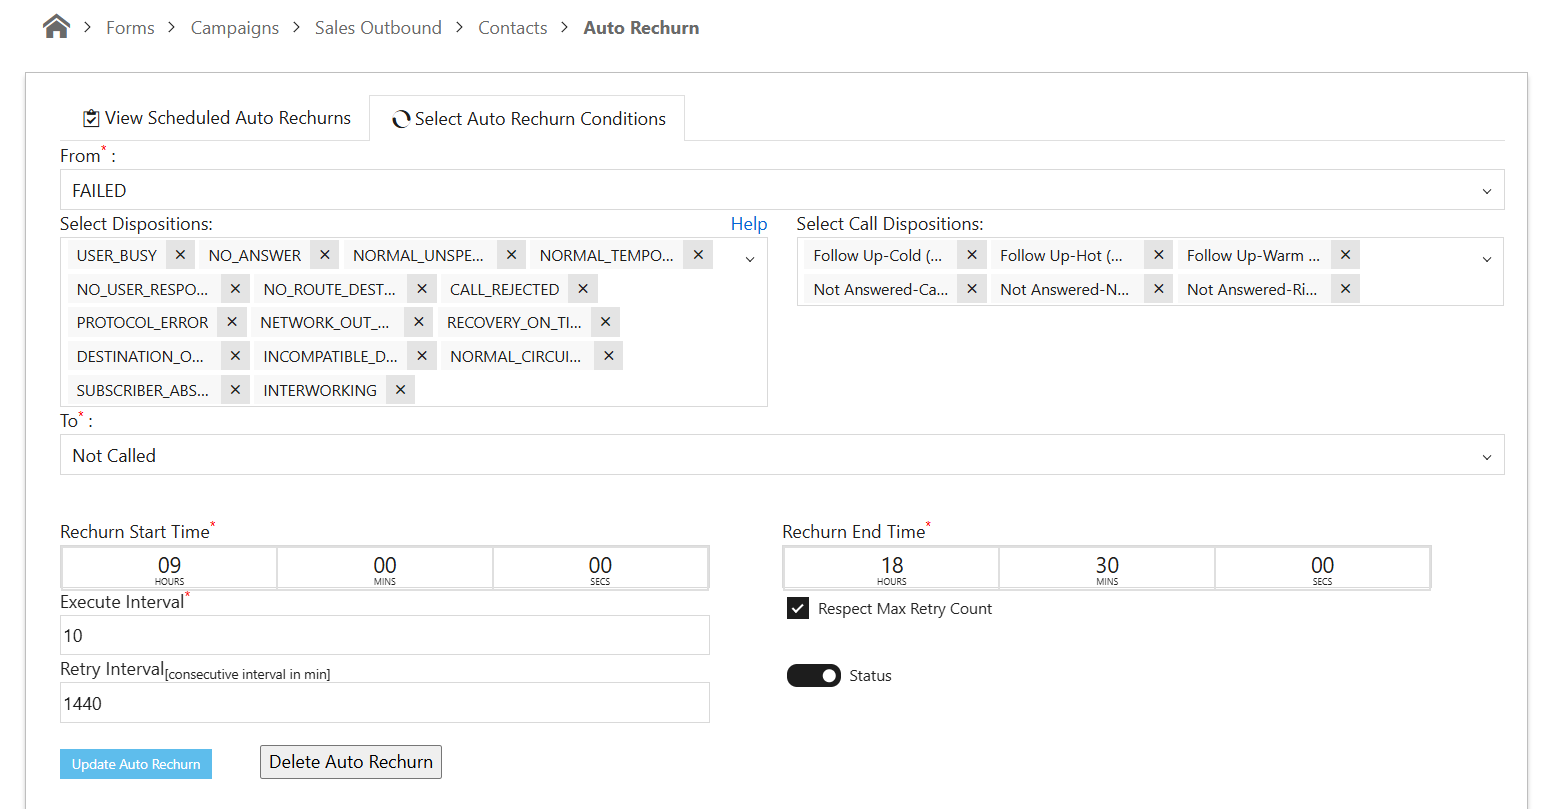
From – Select the current status (Disposition) of the contacts you want to rechurn.
Example: Failed
To – Select the status to which the contacts should be changed before they are dialed again.
Example: Not Called
Rechurn Start Time – Select the time from which Auto Rechurn should start running.
Example: 10:00 AM
Rechurn End Time – Select the time until which Auto Rechurn should run.
Example: 06:00 PM
Respect Max Retry Count – Keep this option checked. The dialer will follow the Retry count configured in the Campaign Settings.
Example: If the Retry count in campaign settings is 2, the contact will be retried a maximum of 2 times.
Retry Interval – Enter the time interval (this will be in minutes) between each retry attempt. The status changes and dials without setting/modifying next call time
Example: 1440 Minutes (The dialer will wait 1440 minutes before retrying the contact)
Status – Keep the Status set to Active to enable Auto Rechurn.
Once these configuration is completed, click on Update Auto Rechurn