WinSCP Setup and File Transfer Guide - IndiaBulls
1. Open the WinSCP application.
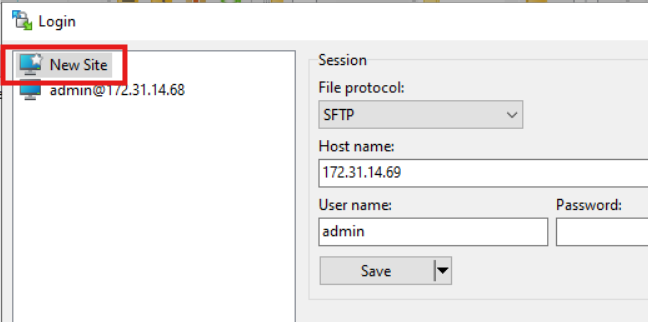
2. On the Login screen, click New Site on the left-hand side.
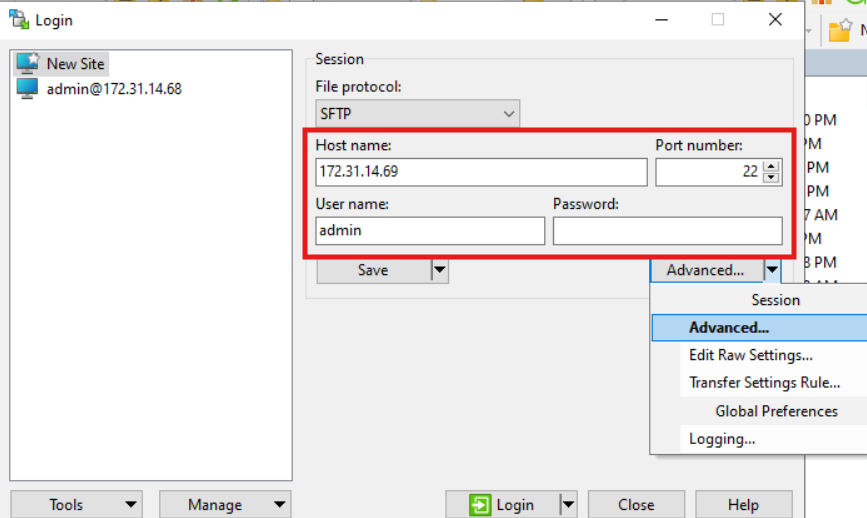
3. Under File protocol, select SFTP. (SFTP is usually selected by default)
4. Enter the server's IP address in the Host name field and admin in the User name field and add required Port number if it is not already populated.
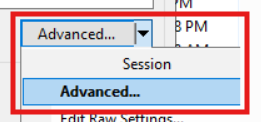
5. Click Advanced on the right-hand side.
6. In the Advanced Site Settings window, go to:
SSH → Authentication.
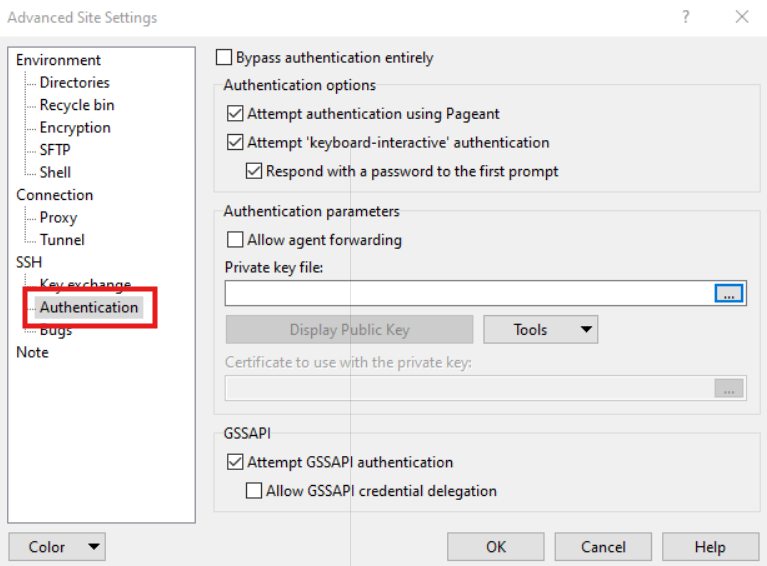
7. Under Private key file, select the respective PEM/PPK key file for the server. (For AWS servers such as Server 1, Server 2, Server 3, and Server 4, which require authentication using a PEM or PPK key file)
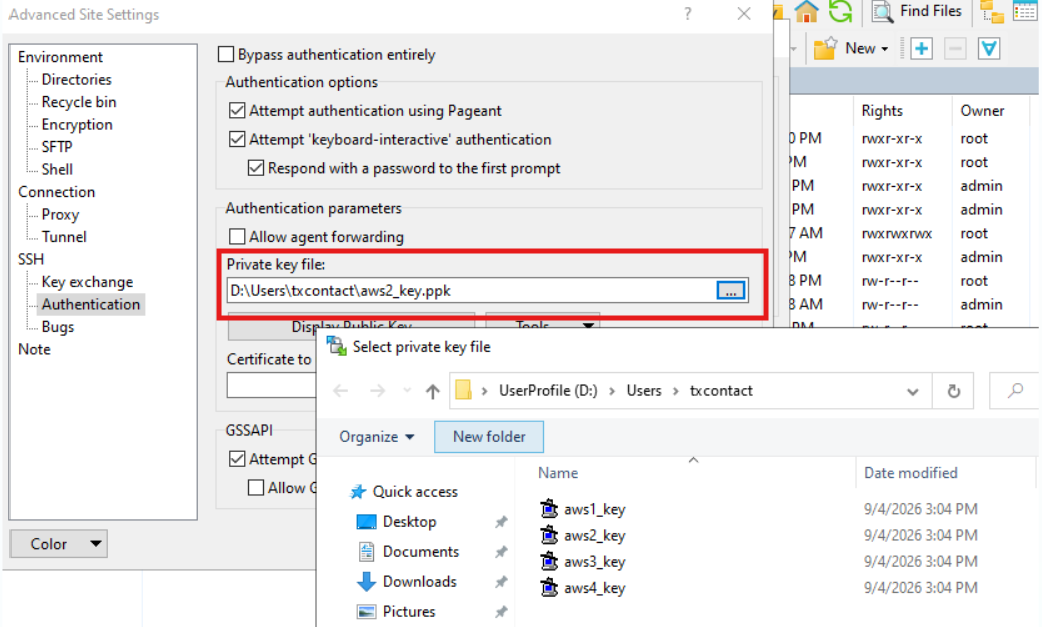
8. Click OK to save the advanced settings.
9. Back on the Login screen, click Save to save the server configuration.
10. Select the saved server and click Login.
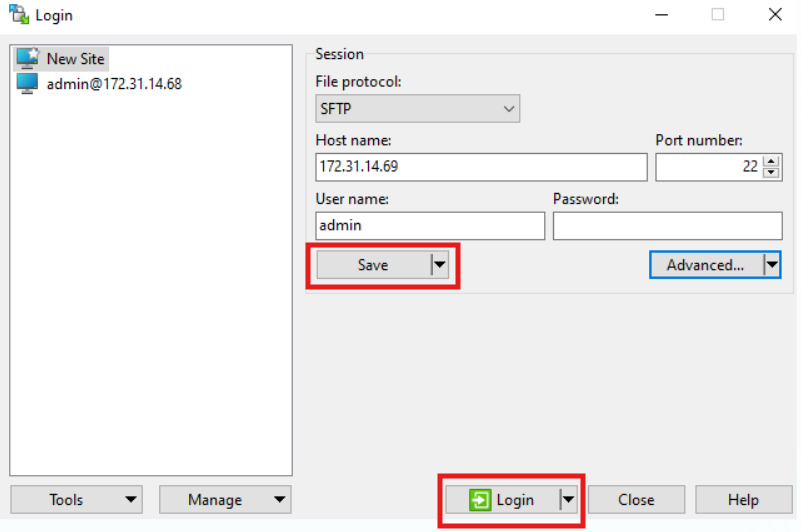
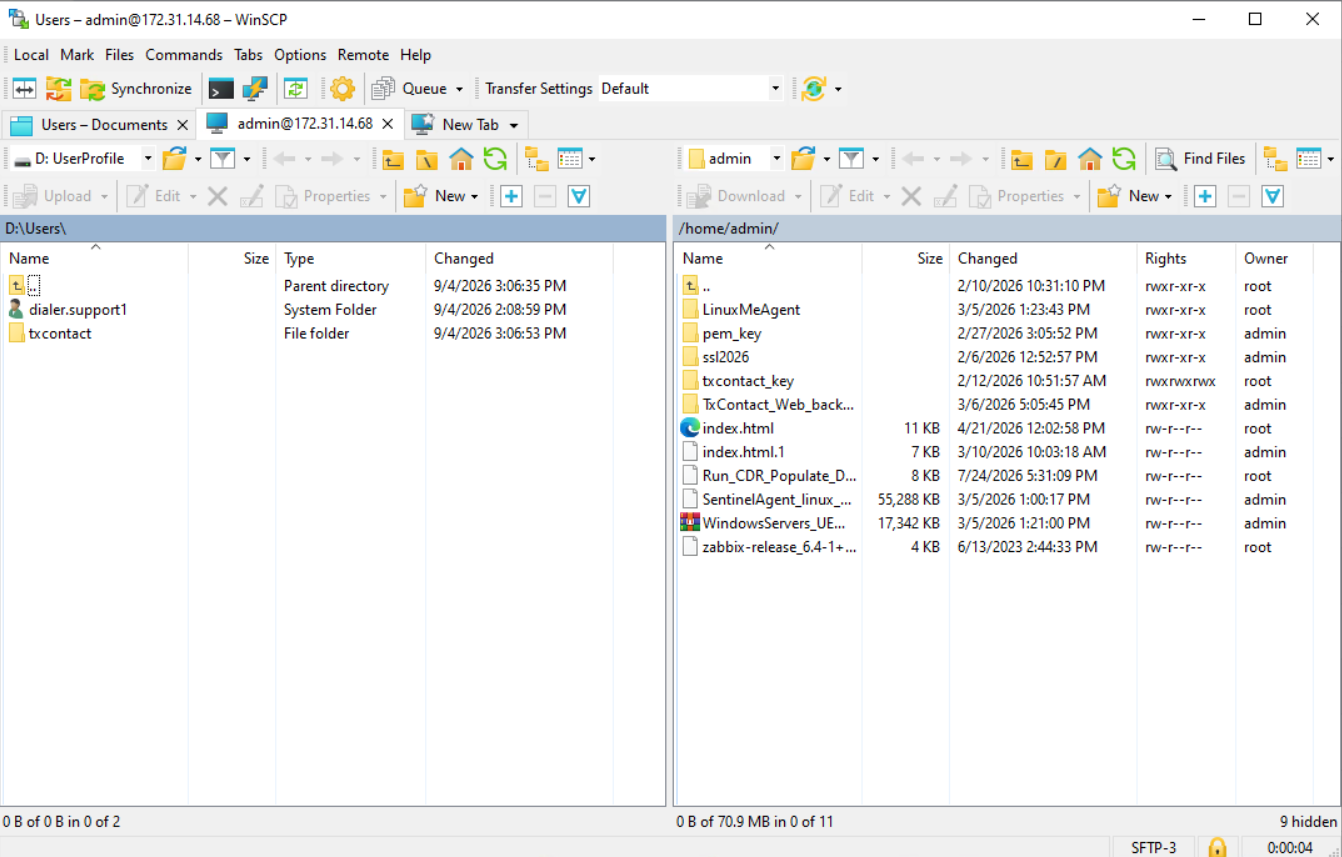
11. Once the connection is established, you will be able to access the server files through WinSCP.
12. Once connected, you can transfer files between the server and your local machine simply by dragging and dropping the files between the respective panels.
2. On the Login screen, click New Site on the left-hand side.
3. Under File protocol, select SFTP. (SFTP is usually selected by default)
4. Enter the server's IP address in the Host name field and admin in the User name field and add required Port number if it is not already populated.
5. Click Advanced on the right-hand side.
6. In the Advanced Site Settings window, go to:
SSH → Authentication.
7. Under Private key file, select the respective PEM/PPK key file for the server. (For AWS servers such as Server 1, Server 2, Server 3, and Server 4, which require authentication using a PEM or PPK key file)
8. Click OK to save the advanced settings.
9. Back on the Login screen, click Save to save the server configuration.
10. Select the saved server and click Login.
11. Once the connection is established, you will be able to access the server files through WinSCP.
12. Once connected, you can transfer files between the server and your local machine simply by dragging and dropping the files between the respective panels.
Did you find it helpful?